Introduction
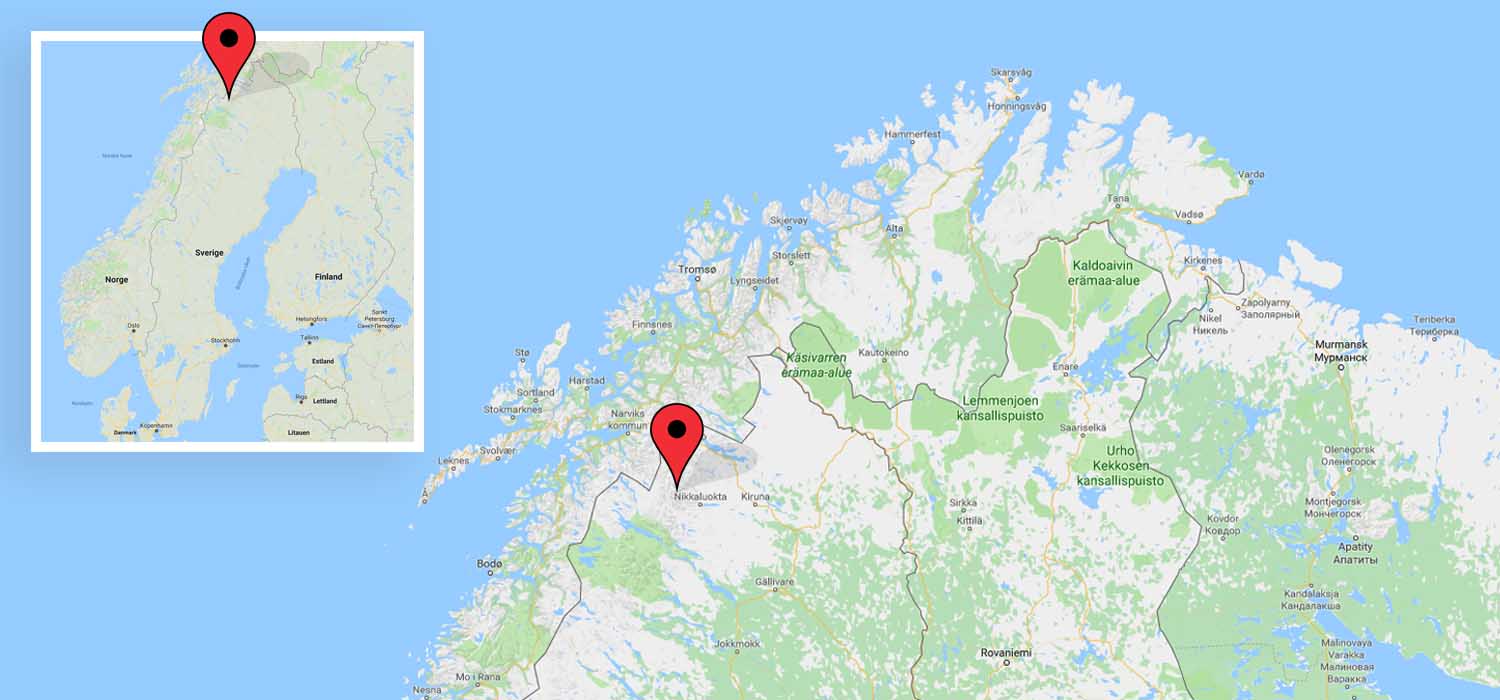
Kebnekaise, standing at 2,097 meters (6,880 feet), is Sweden’s highest mountain and a popular destination for hikers and climbers. Located above the Arctic Circle in Swedish Lapland, it lies west of Kiruna and near the famous Kungsleden hiking trail, which stretches from Abisko to Hemavan. This guide will provide you with all the information you need to successfully summit Kebnekaise, whether you choose the more accessible western route or the technically demanding eastern route.

1. Choosing Your Route
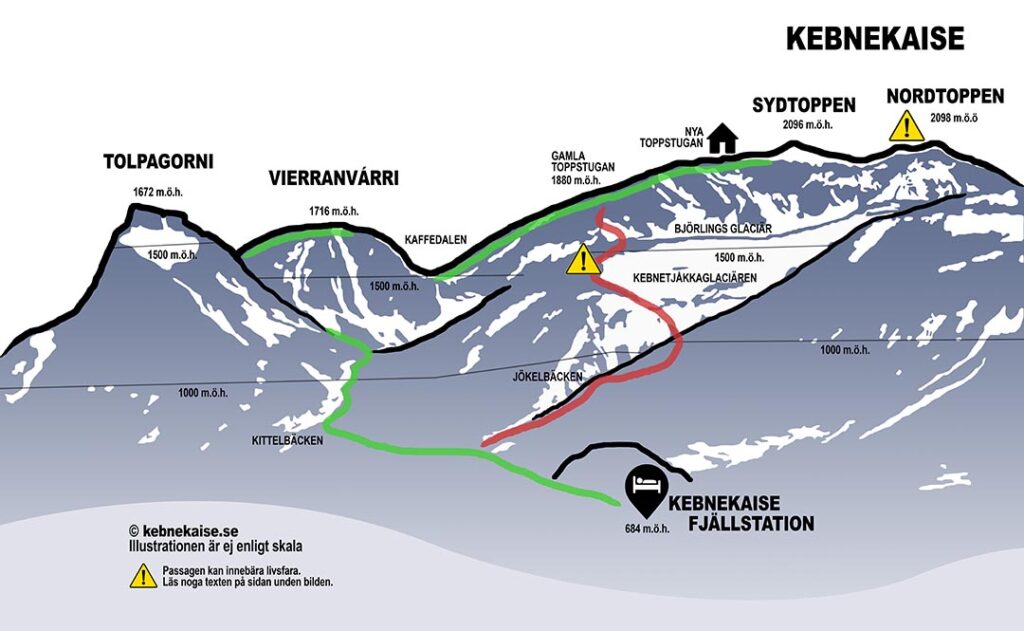
There are two main routes to the summit of Kebnekaise: the western route and the eastern route.
From kebnekaise.se
Western Route (Västra Leden)
- Distance: 18 km (11.18 miles) round trip
- Elevation Gain: 1,800 (5,906 feet) meters
- Duration: 10-15 hours
- Difficulty: Physically demanding but less technical
- Highlights: Well-marked trail, varied terrain including snow, ice, and rocky ground
Eastern Route (Östra Leden)
- Distance: 15 km (9.32 miles) round trip
- Elevation Gain: 1,500 (4,921 feet) meters
- Duration: 8-12 hours
- Difficulty: Technically challenging, requires glacier travel and via ferrata (check out our guide to via ferratas)
- Highlights: Glacier crossings, via ferrata sections, requires a guide for safety
2. Best Time to Climb
The best time to climb Kebnekaise is during the summer months (July to September) when the weather is milder, and the trails are more accessible. Winter ascents are possible but require more experience and equipment due to snow and ice conditions.

3. Preparing for the Climb
Proper preparation is crucial for a successful climb. Here are some key points to consider:
Physical Fitness
Preparing for Kebnekaise involves regular cardiovascular exercise, strength training, and practice hikes on varied terrain to build the necessary endurance and strength, but it’s a hike most people could manage with a little bit of effort.
- Engage in endurance training such as hiking, running, or cycling.
- Practice with a loaded backpack to simulate the conditions of the climb, preferably with walking poles.
Essential Gear
When preparing for a several-day hike, it’s essential to pack gear that ensures your safety, comfort, and ability to handle various conditions. Here’s a comprehensive list of what you should bring:
- Backpack: A well-fitted, durable backpack with a capacity of 50-70 liters to carry all your gear.
- Navigation Tools: Map, compass, GPS device, and a personal locator beacon.
- Shelter: Lightweight tent, bivy sack, or hammock with a tarp.
- Sleeping Gear: Sleeping bag rated for the expected temperatures and a sleeping pad for insulation and comfort.
- Clothing: Moisture-wicking base layers, insulating mid-layers, waterproof and windproof outer layers, extra socks, and underwear. Don’t forget a hat, gloves, and a buff or scarf.
- Footwear: Sturdy, broken-in hiking boots or shoes suitable for the terrain, and camp shoes for comfort (check out our guide on hiking shoes). Because the terrain involves scrambling among loose rocks, we recommend hiking boots with ankle protection, such as those mentioned in this review.
- Food and Cooking Supplies: Enough food for the duration of your hike plus an extra day’s supply, a lightweight stove, fuel, cooking pot, utensils, and a lighter or matches.
- Water: Water bottles or a hydration reservoir, and a water filter or purification tablets.
- First Aid Kit: Comprehensive kit including bandages, antiseptic wipes, blister treatment, pain relievers, and any personal medications.
- Emergency Gear: Emergency blanket, whistle, multi-tool, repair kit (duct tape, zip ties), and a fire starter.
- Illumination: Headlamp with extra batteries.
- Sun Protection: Sunglasses, sunscreen, and lip balm with SPF.
- Personal Items: Toiletries, biodegradable soap, toilet paper, and a trowel for digging cat holes.
- Power Bank: To keep your electronic devices charged.
- Trekking Poles: To help with balance and reduce strain on your joints.
- Crampons: Essential for traversing icy or snowy terrain, providing extra traction and stability.
Winter: Touring skis, skins, avalanche equipment, warm clothing, and knowledge of winter mountain conditions. Proper preparation and packing can make your multi-day hike safer and more enjoyable. Always tailor your gear to the specific conditions and challenges of your hike.
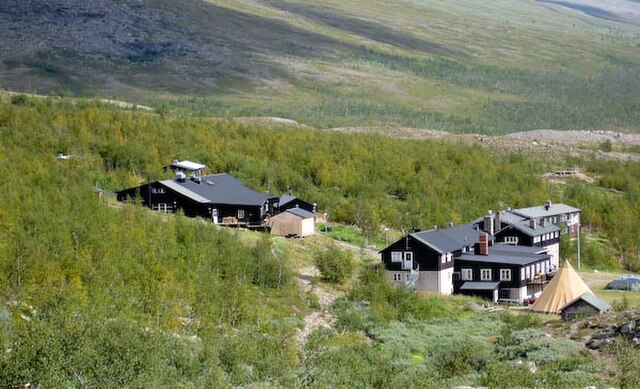
4. Accommodation and Logistics
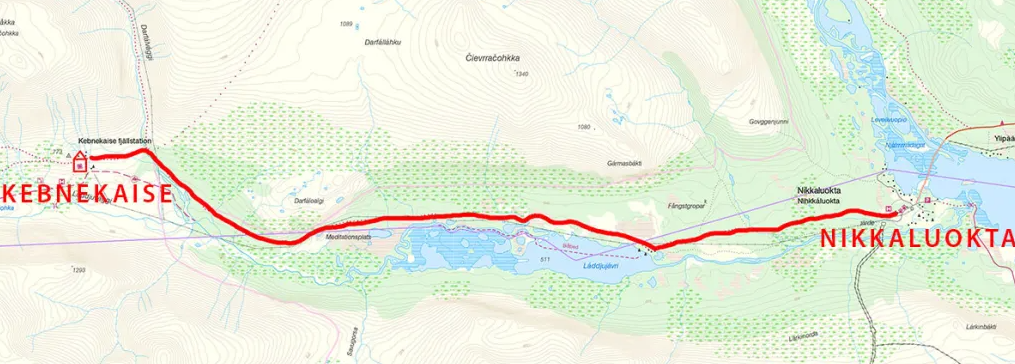
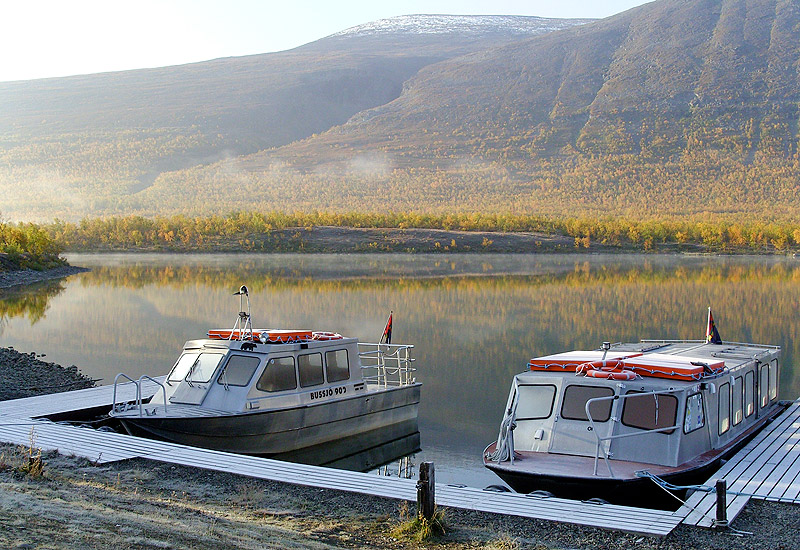
The starting point for both routes is the STF Kebnekaise Mountain Station, which offers accommodation, a restaurant, and other amenities. You can reach the station by hiking from Nikkaluokta, an approximately 19-kilometer (11.81 miles) hike, which takes about 5-8 hours. Alternatively, you can shorten the hike by 5 kilometers (3.11 miles) by taking a boat (approx. 30 min) across Lake Ladtjojavri (contact Enoks for more information), or abstain from this part of the hike completely by renting a helicopter (approx. 10 min) from Nikkaloukta (contact Kallax Flyg for services).

Accommodation Options in Nikkaluokta and Fjällstugan
- Cabin Rentals: You can rent cabins in Nikkaluokta (Nikkaloukta Sarri) or at Fjällstugan. These cabins offer a comfortable stay with amenities such as kitchens, showers, and sometimes saunas.
- Advantages: Provides shelter from the elements, more comfortable sleeping arrangements, access to cooking facilities, and a warm place to rest.
- Disadvantages: More expensive than tenting, limited availability during peak seasons, and less flexibility in location.
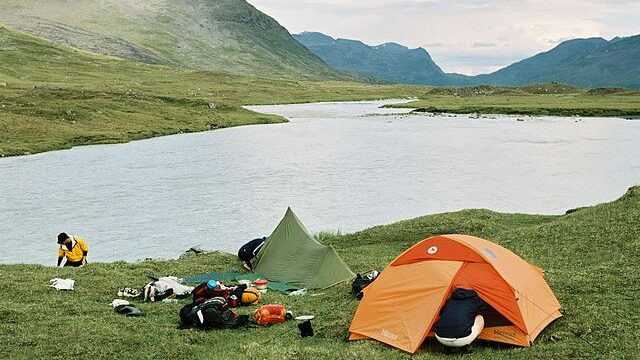
- Tenting: You can also choose to camp in the proximity of Nikkaluokta or Fjällstugan (at a low cost for use of facilities), or at any place of your choice along the trail.
- Advantages: More affordable, offers flexibility in choosing your campsite, and allows you to immerse yourself in nature.
- Disadvantages: Exposure to weather conditions, less comfortable sleeping arrangements, and the need to carry camping gear.
5. Getting to Nikkaluokta from Stockholm
There are several ways to travel from Stockholm to Nikkaluokta, each with its own advantages:
By Train
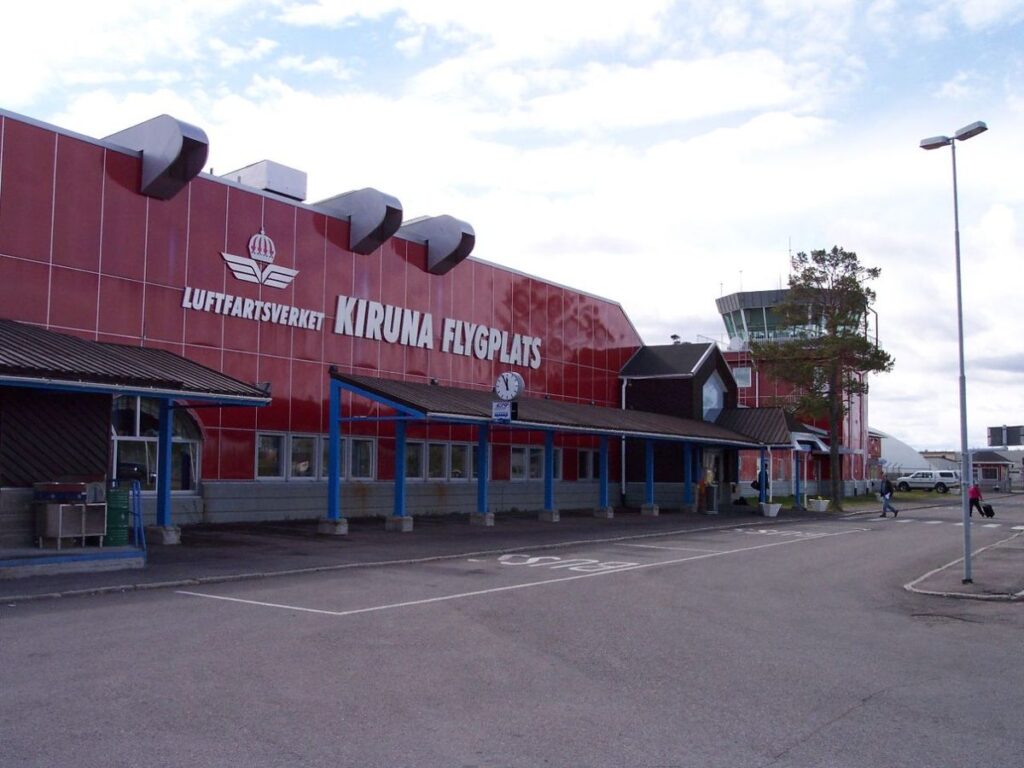
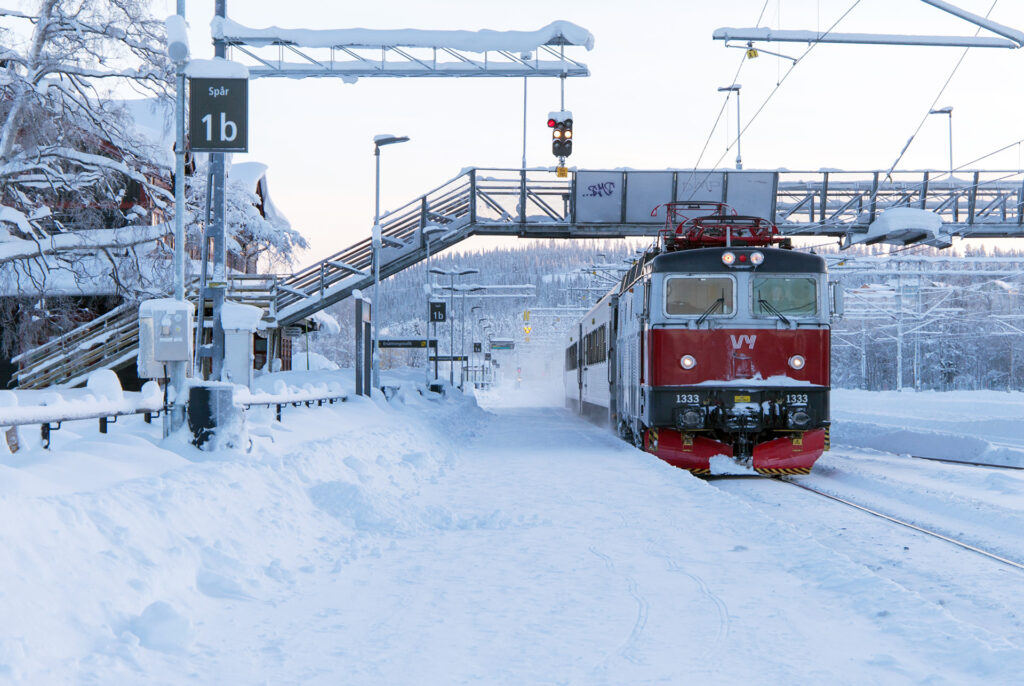
- Train: Take the overnight train from Stockholm Central Station to Kiruna Station. The journey takes about 15-16 hours.
- Taxi: From Kiruna Station, take a taxi to Nikkaluokta, which takes about 1 hour.
- Total Duration: Around 16-17 hours.
- Train Operators: Swedish Railways (SJ), Vy Nattåg.
By Car
- Driving: The drive from Stockholm to Nikkaluokta is approximately 1,295 kilometers and takes about 14-15 hours.
- Route: Drive north on the E4 highway, then take the E10 towards Kiruna, and finally follow the signs to Nikkaluokta.
- Advantages: Offers flexibility and the opportunity to explore other parts of Sweden along the way.
By Plane
- Flight: The fastest way is to fly from Stockholm-Arlanda Airport (ARN) to Kiruna Airport (KRN). The flight takes about 1 hour and 40 minutes.
- Taxi: From Kiruna Airport, you can take a taxi to Nikkaluokta, which takes approximately 1 hour.
- Total Duration: Around 4 hours, including transfers.
- Airlines: Scandinavian Airlines (SAS), Norwegian Air International.
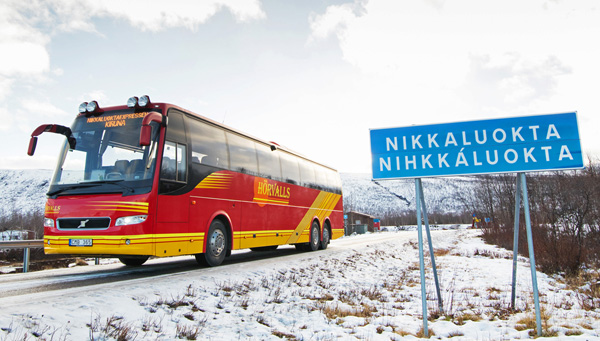
By Bus (from Kiruna)
- Bus: Take the Nikkaluoktaexpressen bus from Kiruna to Nikkaluokta. The bus operates during the hiking season and takes about 1-1.5 hours.
- Company: Nikkaluoktaexpressen.
6. Safety Tips
When hiking in Kebnekaise, it’s crucial to be prepared for emergencies. The general emergency number in Sweden is 112, which you can call for any emergency, including medical, fire, and rescue services. For specific mountain safety advice, you can contact the Mountain Safety Council via email at fjallsaker@naturvardsverket.se. If you are near the Kebnekaise Mountain Station, you can reach them at +46 980 550 00 or kebnekaise@stfturist.se.
While calling emergency services is free, rescue operations, especially those involving helicopters, can incur significant costs. It’s important to avoid using helicopter services unnecessarily, as there has been an increase in such cases recently. Always carry a reliable means of communication, such as a fully charged mobile phone and a power bank. Check which phone providers have a signal in the area, but be aware that a signal may not always be available. In such circumstances, it’s important to get in contact with other hikers, which is more likely if you stick to the path and hike during normal waking hours. Inform someone of your itinerary and expected return time to ensure help can be dispatched efficiently if needed.
- Check the Weather: Always check the weather forecast before your climb. Conditions can change rapidly in the mountains.
- Carry Extra Supplies: Bring extra food, water, and clothing to prepare for unexpected delays or changes in weather.
- Navigation Tools: Use a map and compass or GPS for navigation to avoid getting lost.
- Crampons: Essential for traversing icy and snowy sections, especially near the summit. They provide the necessary traction to prevent slips and falls.
- Warm Water Bottle: Carry a warm water bottle to stay hydrated and to help keep you warm during the climb.
- Hire a Guide: Consider hiring a guide, especially for the eastern route or winter ascents, to ensure safety and proper navigation.
- Respect the Environment: Respect the alpine environment and be prepared for rapidly changing weather conditions.
If you find yourself left alone on the mountain during the night, staying calm is crucial. First, find or create shelter to protect yourself from the elements, using natural materials like branches, leaves, or snow to insulate yourself from the cold ground. Layer your clothing to retain body heat and keep it dry. If you have a flashlight or headlamp, use it to signal for help and make yourself visible to rescuers. Just below the top plateau, there is an old smaller cabin at 1,880 meters (6,168 feet) altitude.
Stay hydrated by melting snow if necessary, but avoid drinking melted glacial ice directly, as it can contain harmful microorganisms and minerals that may cause illness. Additionally, eating snow directly can lower your body temperature, so always melt it first. Avoid moving around too much to conserve energy and stay in one place to make it easier for rescuers to find you. If you are close to the summit, you can seek refuge in one of the two mountain huts: these huts provide shelter, making them good spots to wait for rescue. Keep a positive mindset, focus on staying warm and safe, and remember that rescue is likely on the way. Be aware of your surroundings, for example by reading our guide on flora and fauna in Swedish Lappland.
7. The Climb: Step-by-Step
Eastern Route (Östra Leden)
- Start at STF Kebnekaise Mountain Station
- Begin your journey from the STF Kebnekaise Mountain Station. Ensure you have all your gear and supplies ready.
- Follow the Trail into Kitteldalen
- Head westward into Kitteldalen. The trail is well-marked and initially follows a relatively gentle incline.
- Crossing the River Pass
- After a few kilometers, you’ll reach a river pass. Depending on the season and recent weather, this river can be flooded. Use caution and look for the safest crossing point. If the water level is too high, consider waiting for it to subside or finding an alternative route.
- Climbing the Stairs
- Shortly after the river crossing, you’ll encounter a series of rudimentary stairs made out of large stone blocks. These stairs help hikers ascend a steep section of the trail. Take your time and be cautious, as there are no railings for support.
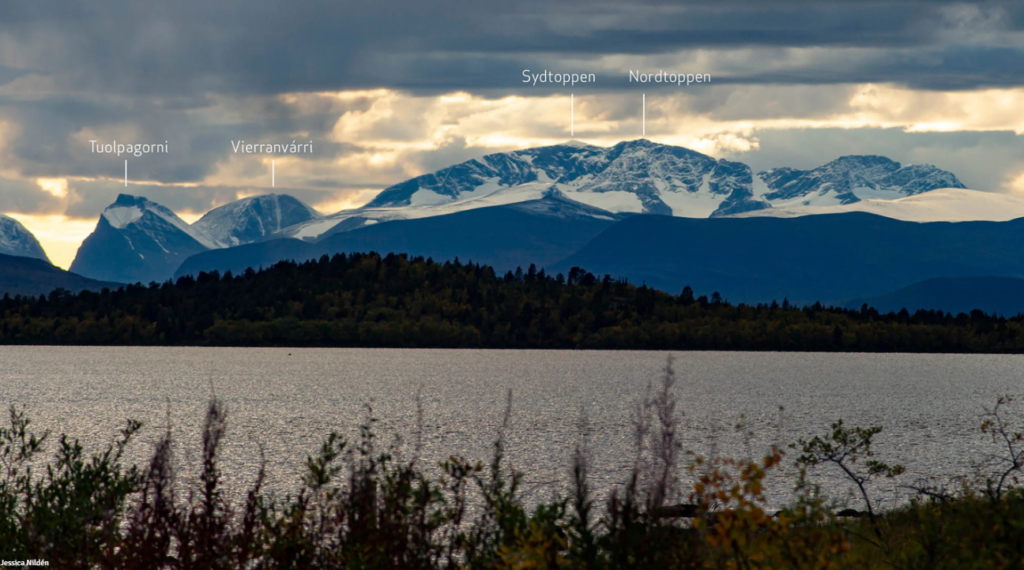
- Ascend Vierranvarri
- Continue climbing steeply up Vierranvarri. This section is physically demanding, with a significant elevation gain. The terrain is rocky, and you may encounter patches of snow and ice.
- Descend into Kaffedalen
- After reaching the top of Vierranvarri, you’ll descend into Kaffedalen. This valley can be quite windy and cold, so make sure to layer up. The descent is steep, so watch your footing.
- Final Ascent to the Old Summit Hut
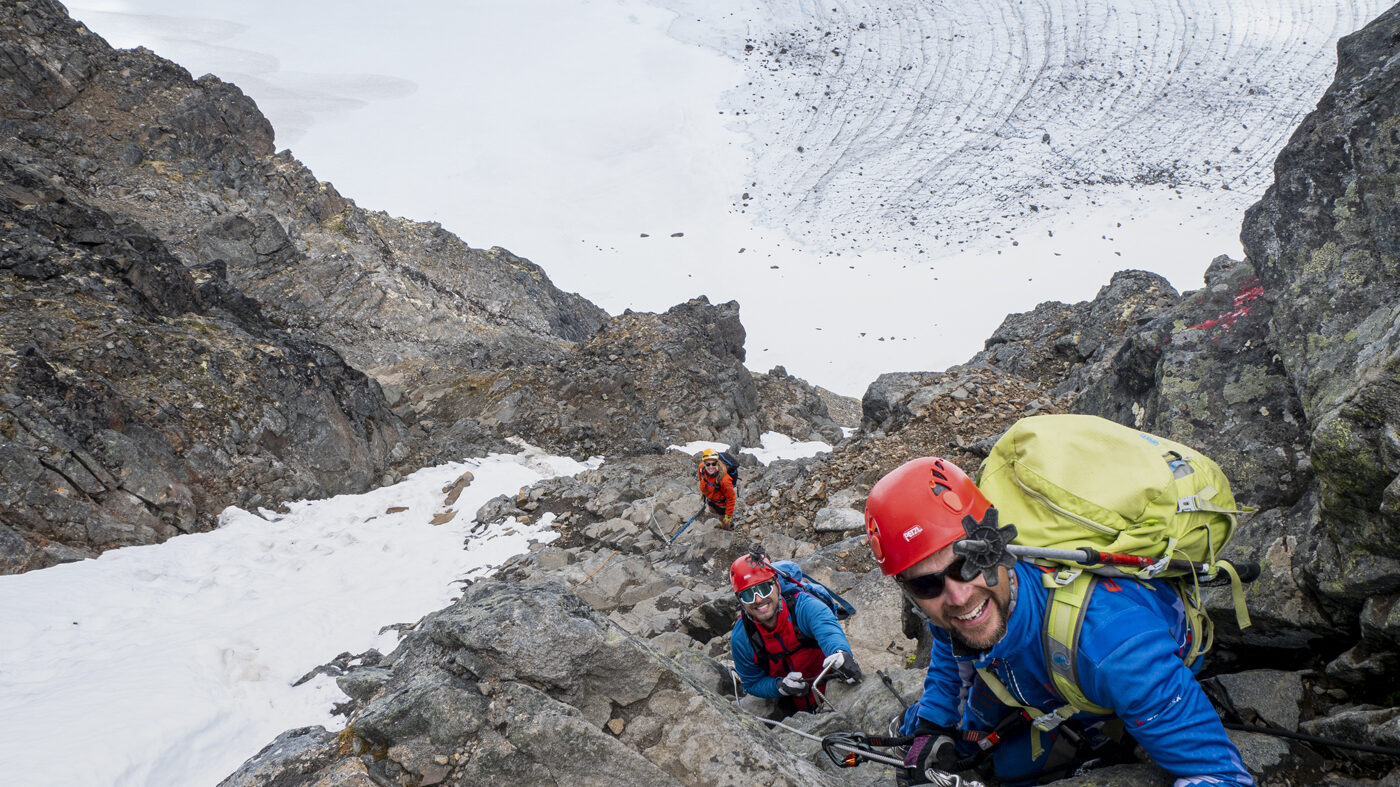
- From Kaffedalen, begin the final ascent to the Old Summit Hut. This section is the most challenging part of the climb, with a steep slope leading up to the summit glacier involving grade I scrambling (check out this guide on scrambling). Use crampons if necessary, especially if the trail is icy.
- Summit Glacier
- Once you reach the Old Summit Hut, you’ll need to traverse the summit glacier. This section requires careful navigation and the use of crampons for traction. Follow the marked trail and be mindful of crevasses.
- Summit
- Finally, you’ll reach the south peak of Kebnekaise. Take a moment to enjoy the panoramic views and celebrate your achievement. The south peak offers stunning vistas of the surrounding landscape.
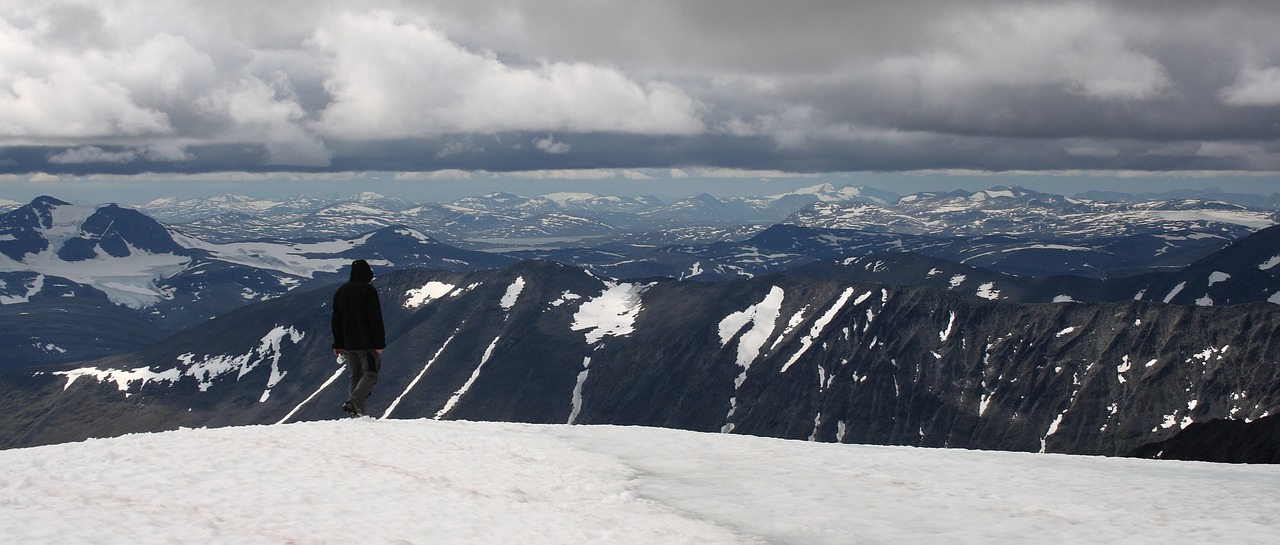
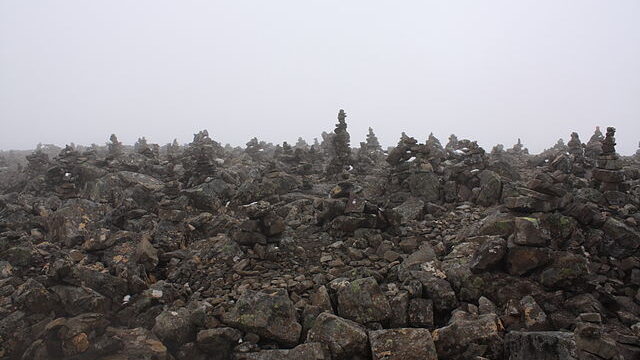
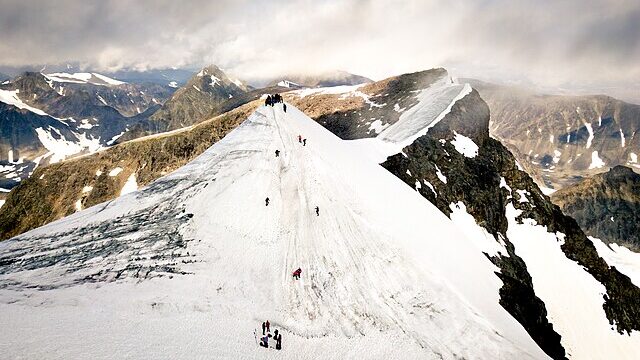
The rocky top of the Western Route with the glacier peak (south peak)
Eastern Route (Östra Leden)
1. Start at STF Kebnekaise Mountain Station
- Preparation: Ensure you have all necessary equipment, including crampons, an ice axe, helmet, gloves, and harness for the via ferrata.
- Direction: Head east from the mountain station, following the marked trail towards the glacier.
2. Approach to the Glacier
- Terrain: The initial part of the hike involves a gradual ascent over rocky and uneven terrain.
- Navigation: Follow the trail markers and be mindful of the changing landscape as you approach the glacier.
3. Glacier Crossing
- Equipment: Put on your crampons and harness, and use your ice axe for stability.
- Technique: Roped travel is recommended if you are in a group. Carefully navigate the glacier, watching for crevasses and maintaining a steady pace.
- Safety: Ensure you are familiar with glacier travel techniques and always stay alert to the conditions underfoot.
4. Reaching the Via Ferrata
- Transition: Once you cross the glacier, you will reach the base of the via ferrata section (graded at difficulty class B-C: moderate).
- Preparation: Secure your harness and helmet, and prepare for the climb.
5. Via Ferrata Ascent
- Climbing: Use the fixed cables and ladders to ascend the steep, rocky sections (grade III scrambling). This part of the route is exposed and requires careful attention to hand and foot placements.
- Focus: Maintain three points of contact at all times and move steadily, ensuring your safety gear is properly used.
6. Final Ascent to the Summit
- Terrain: After the via ferrata, the path continues to be steep but less technical.
- Effort: Push through the final stretch, using your hands for balance as needed.
- Summit: Reach the south peak of Kebnekaise, where you can enjoy the stunning panoramic views.
7. Enjoy the Summit
- Reward: Take in the breathtaking scenery and the sense of accomplishment from completing the challenging ascent.
- Rest: Spend some time at the summit to rest and take photos before beginning your descent.
8. Descent
- Route: Carefully retrace your steps, paying close attention to the via ferrata and glacier sections.
- Safety: Take your time and ensure you descend safely, especially on the more technical parts of the route.
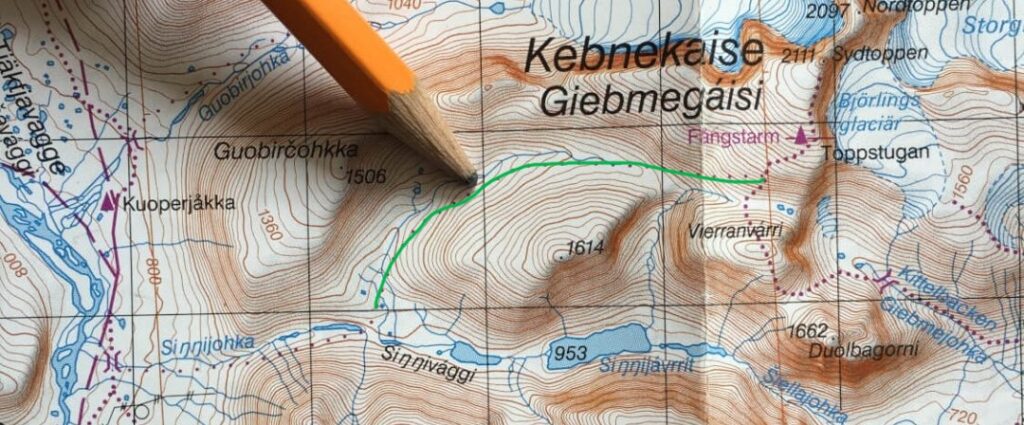
Alternative Route: Durlings Led
For those seeking a less crowded and more adventurous route, Durlings Led is the alternative. This trail starts from Singi, which is accessible from the Kungsleden trail. To reach the entry point, follow Kungsleden from the Kebnekaise Mountain Station towards Singi. Once you reach Singi, look for the path leading into the Singivaggi valley. This is where Durlings Led begins its ascent.
Durlings Led is shrouded in mystery and offers a more solitary experience compared to the popular western and eastern routes. The trail is less frequented, making it a perfect choice for those who seek solitude and a deeper connection with nature. However, this also means that it is more dangerous. The path involves grade II scrambling and requires good balance and caution, especially in rocky and potentially slippery sections. The lack of fellow hikers means that in case of an emergency, help might not be readily available.
- Distance: Approximately 24 km round trip
- Highlights: Scenic views, less crowded, steady elevation gain
- Considerations: Requires good balance and caution, especially in rocky and potentially slippery sections. Suitable for experienced hikers looking for a quieter and more challenging route.
From vandringsguiden.se
Post-Climb Tips
- Celebrate your achievement at the mountain station.
- Share your experience with fellow hikers and climbers.
- Reflect on the journey and plan your next adventure!
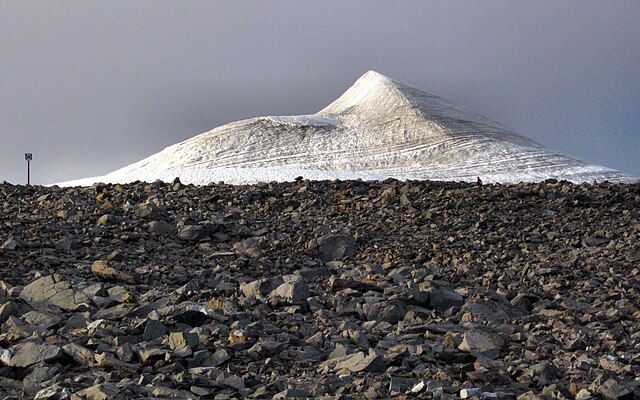
North and South Peaks: The Height Debate
Kebnekaise has two main peaks: the northern peak and the southern peak. Historically, the southern peak, which is covered by a glacier, was the highest point in Sweden. However, due to climate change and the melting of the glacier, the height of the southern peak has been decreasing.
As of recent measurements, the northern peak, which is a rocky summit, has become the highest point at 2,096.8 meters, surpassing the southern peak, which now stands at approximately 2,094.6 meters
This change has sparked a debate among climbers and researchers about which peak should be considered the true highest point of Kebnekaise. The northern peak’s height remains constant, while the southern peak’s height fluctuates with the seasons due to snow and ice accumulation and melting.

Related activities that you might want to check out while you are here
 Lunch tour to the Sami village Nikkaluokta


Kiruna Northern Lights Tour with Photographer
")


 Sit Down Husky Ride Dog Sled Tour in Kiruna

")
